There are many challenging assignments throughout your course that will develop all aspects of your photography. However, I recommend doing some optional shooting projects to practice and reinforce your basic technical skills.
In this article, I’m going to give you three simple shooting projects you can work on in your spare time. These projects are suitable after you have completed assignments one and two.
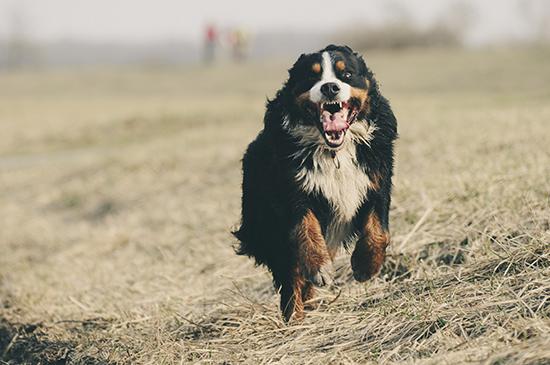
Project 1 - freezing motion
The first project is to shoot a pet in motion in your back garden or local park. The aim is to get a pin-sharp photograph with a shallow depth of field and focus on the face of the subject. Shoot in manual exposure mode and adjust your camera controls as follows:
- Aperture - keep it wide open to blur the background
- Shutter speed - needs to be high to capture the motion (approximately 1/1000 of a second)
- ISO - needs to be high enough to accommodate this fast shutter speed
Focusing is important so activating the continuous Autofocus (AF) mode will keep your focus working throughout the exposure. Try to use just one active AF point and keep this over the head of the subject as they move towards you and across the camera. Don’t be afraid to get low to the ground! If you are doing things correctly you will get a sharp image, perfectly in focus and nicely exposed. Look at your results, paying special attention to the focus.
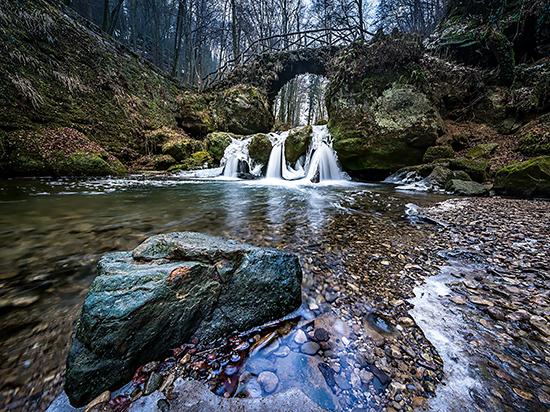
Project 2 – landscape
The second project is to shoot a landscape photo which has moving water and keep a deep depth of field. You will need a stable tripod here and what we are looking for you to do is get a dramatic landscape shot with great depth of field, high image quality and moving water. The water could be the sea or a river. Again, shoot in manual mode.
- Use single shot autofocus
- Have a closed aperture to give great depth of field (perhaps F16)
- Use a low ISO (e.g. 100) to keep image quality high.
- This will force you to use a slow shutter speed and the nice thing is you get motion blur on the moving water
If shooting the landscape on a bright day, you will only have minimal motion blur so you could try early morning or early evening. The low light levels in these conditions and the required longer shutter speed will give you more motion blur. If you are releasing the shutter without a remote release or cable release, you can get minor camera shake as your finger touches the shutter. You can get around this by using the self-timer mode on the shutter release.

Project 3 - portrait
The third and final project is to shoot a simple portrait indoors in natural light. Try shooting an image with a shallow depth of field (this means a wide aperture is required). If possible, use a short telephoto focal length and leave the camera in auto white balance mode. Use a shutter speed and ISO combination which balances ISO quality with a fast-enough shutter speed for the focal length and to remove any camera shake or subject motion blur.
In your image processing software, try manipulating the white balance, contrast, highlights and shadow detail so you bring the very best out of your portrait.
These three optional projects will stretch and test your basic camera exposure controls, exposure balance, focus accuracy and develop your image processing skills. The more you practice, the better you will get and the easier your assignments will become! Let us know how you get on.